Import, transform, and use your data from a CSV into Notion - full guide
CSV (comma-separated-value) files are one of the most common formats for storing semi-structured data. CSVs are most often composed of columns and rows, which you can visualize in a spreadsheet (e.g., Google Sheets, Microsoft Excel), downloaded from a database table (e.g., MongoDB, Firebase), or a no/low-code tool for specific use-cases such as Asana, Trello, Jira, and others.
Due to its common use, CSV files can be easily manipulated and exported/imported across tools. In this video some time ago I explored the effectiveness of Notion and Coda at loading and manipulating a relatively large CSV file.
This article explores how importing CSV files into Notion works, and how to think about the process of importing data, especially when it comes to a relatively large amount of data that may be initially messy and needs cleanup.
How to import data from CSV into Notion
There are two ways to import a CSV file into Notion as of the beginning of 2024. First, you can import a CSV file into Notion by clicking “Import” at the bottom of the left sidebar in the Notion desktop or web application, then selecting the “CSV” option. Second, you can import a CSV file into Notion by clicking on the 3 dots at the top right corner of any Notion database, and then selecting “Merge with CSV”. Both options involve a Notion database, which is created automatically with option #1, and manually by you at first with option #2 (and then automatically populated from the CSV columns and rows).
Once you follow the steps of one of the options, the CSV import will start and it will take a few seconds to a few minutes depending on the size of the CSV file (how many columns and rows it contains). After the import is successful and the database has been created, you may check that all the rows and columns have been imported into the database and that all the columns are in the correct data format (e.g., emails of email type, phone numbers of phone type, dates of date type, etc.).
Notion properties (columns) can be of specific data types (e.g., text, number, date, relation, formula, etc.). So, for an optimal and full import experience, it is good practice to do some quality checks of the data types and update the property data types as needed. This may take the most time and effort in the overall import process, particularly if the data set you imported is very large and some columns are not in the correct format (e.g., what would be best as a date or relation property is in text format or similar scenarios).
Ensuring properties are of the correct data types can make a difference in the quality of the data and user experience, especially if you plan to use the database in Notion moving forward. This process is generally referred to as ETL (extract-transform-load) in data analysis.
How to import data from other tools/formats into Notion
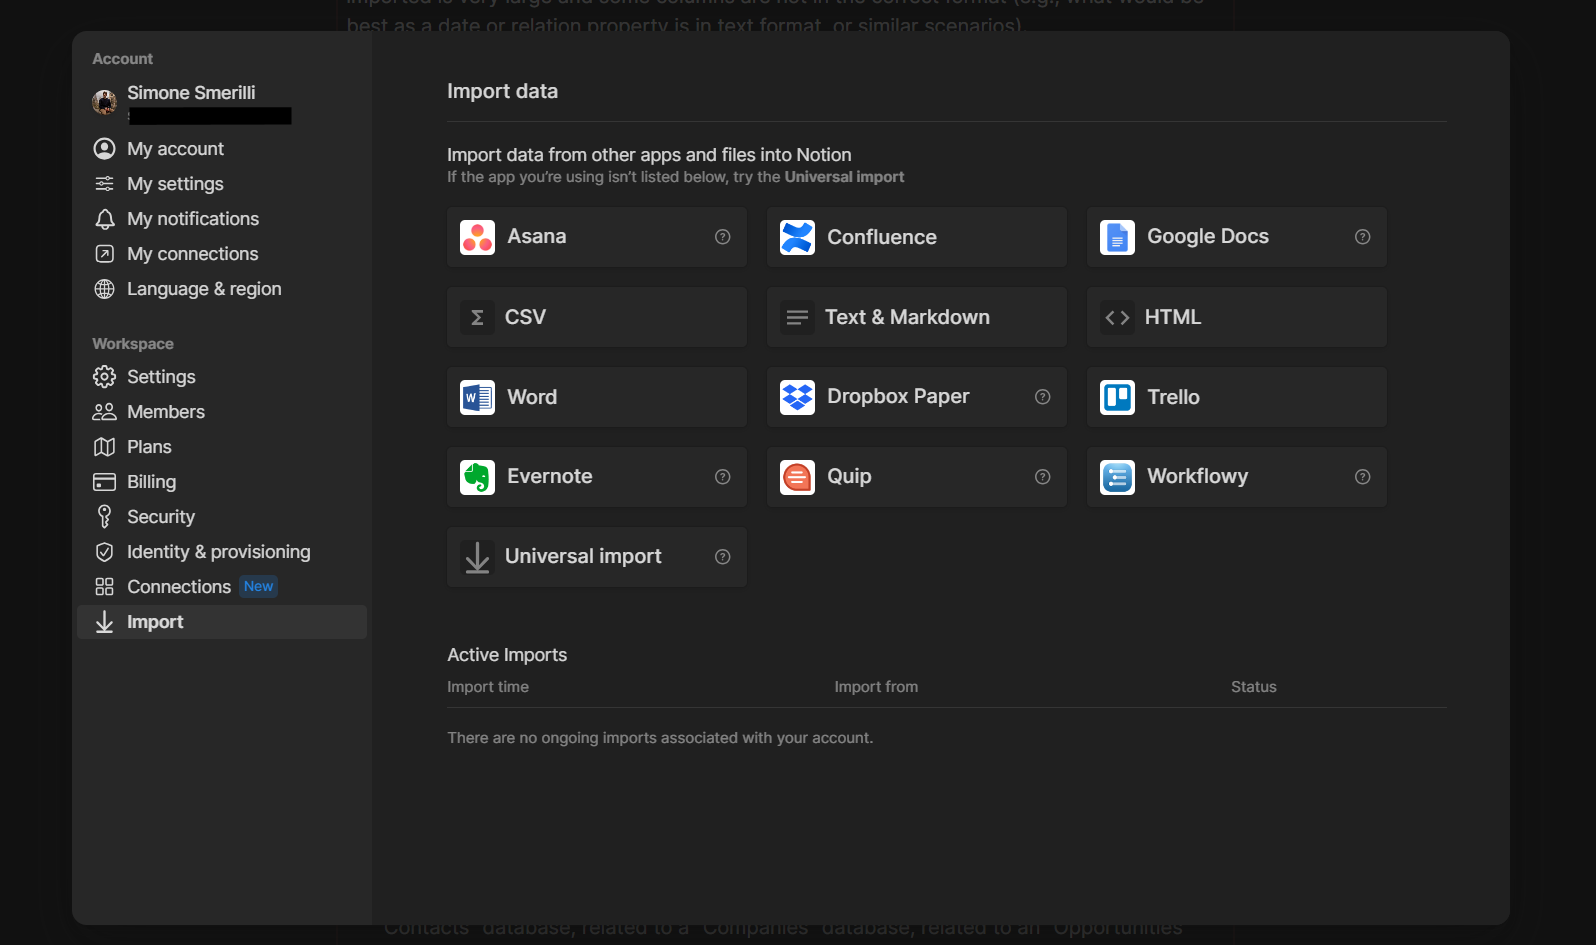
The Notion “Import” menu is accessible from the bottom left sidebar option and from “Settings & members”
Besides CSV files, Notion has native integration with multiple other file formats and software tools. In this essay, I am focusing on the file formats available at the bottom of the left sidebar in Notion. There are also native syncs (synced databases) with tools such as Jira, Asana, and Github, but they are outside of the topic of this post (and will be the focus of an upcoming essay and video content).
When importing data from a supported tool in the list (e.g., Asana, Confluence, Trello) into Notion, you can select the dedicated option on the Import menu, authenticate your account, and follow the on-screen prompts to import the data into Notion. The same ETL process is valid in this case too. The imported data may need to be optimally structured due to some differences in the basic building blocks between Notion and the third-party tool.
When you are not sure which file type you need to import, or you would like to import data from an application not listed in the Import options, you can try the Universal importer. This works with ZIP files too. When using the universal importer in Notion, you may get to pay even more attention to the ETL process, since the data imported may be of various types, and the process may end up corrupting some parts of the data to make it work for the closest possible Notion format as interpreted by the universal import algorithm.
FAQs and edge cases
When loading data to Notion, there are some unique quirks and edge cases to keep in mind, as well as some frequently asked questions worth considering as part of your competence-enhancing journey through the Notion data import experience. This section outlines those elements.
-
1. One possible error you may get is when a CSV file is too large to load in one single import. In such a situation, you may break down the CSV files into multiple smaller imports
2. In my experience when importing large datasets (e.g., more than 10,000 rows), you may get the “importing” spinning wheel loading for a long time without any visible user message. This may indicate that the CSV file is too large for one single import. You may break it down into multiple smaller imports.
-
The most important practice is to structure the CSV file so that the first row is composed of header columns. This will ensure the algorithm accurately recognizes the columns during the import process and creates the corresponding Notion properties.
-
No, as of December 2023. You can only import data from the Notion desktop or web apps, not on mobile.
-
It depends on the specific situation. In general, there are two main possible scenarios:
1. You use “merge with CSV” on a Notion database that does not have any pages yet. In this case, the CSV import will work smoothly and the data get loaded into Notion
2. You use “merge with CSV” on a Notion database that already has a defined data structure and pages. In this scenario, the CSV data will be added to the Notion database, including potential duplicates. As of December 2023, “merge with CSV” in Notion does not detect duplicates and is not capable of updating existing pages automatically. For a more accurate import experience, you may automate the process (see dedicated FAQ below).
-
The importer will only import the first workbook (tab) in your spreadsheet
-
You will do lots of data manipulation, especially for relation properties, because the optimal data structure for a multi-table system is likely to create one Notion database per entity and relate the databases together.
For example, as part of a CRM, you may have a “Contacts” database, related to a “Companies” database, related to an “Opportunities” database. Relations can be populated automatically via CSV import if you use the “Merge with CSV” option available on any database, and create the relation properties before importing the CSV data.
Make sure that the property names in Notion match the headings in the CSV. You can import one table at a time to Notion. For example, start by importing the “Companies” CSV, which also includes a column heading named “Contacts”, where there is a list of comma-separated contacts related to each company.
Then, import the “Contacts” CSV, which also includes a “Company” column heading that includes the value of the company each contact belongs to. When you import this CSV, the relation between “Companies” and “Contacts” in Notion will be auto-populated, as long as the column names between the CSV and Notion are the same.
Auto-populating relation properties from CSV imports in Notion is currently limited for the first 1000 entries due to performance optimization.
-
Yes, by using a tool such as Make/Zapier/n8n/Pipedream (or any other API software you may use). In this case, a possible process to achieve a successful automatic import process is the following:
1. Clean up the CSV file data to ensure the appropriate columns format
2. Upload the CSV into Google Drive and turn it into a Google Sheets
3. Connect your Google Sheets and Notion accounts in the dedicated API app
4. Develop the automation logic to handle relation properties if needed. You can do this by running the automation on one spreadsheet tab at a time, where each tab corresponds to a different database in Notion. Ensure there is at least one common property value between related entities as part of the import process so that you can include logic in the automation to find related pages and successfully link them.
-
You can undo an import in two ways depending on your scenario:
1. If you have imported a new database, you can delete the database completely and start the import from scratch
2. If you have used “merge with CSV” on an existing database, you can navigate to the page history (from the 3 dots at the top right corner of the Notion database), and restore the database version before the import
If, for any reason, this option does not work — I mention this because I know the page history in Notion may not work as expected sometimes — you may filter the database to only show pages created at the time of the import (e.g., “today”), delete them, and restart the process.
Similar Articles
Affiliate Links
Build your web forms with Tally (integrates natively with many tools)
Get one free month on the pro plan in Make (automation software)
Get 20% off any Centered subscription (deep work sessions tracker with AI coaches) by using the discount code
SIMONE20here.