
Notion workspace webhooks: instant automation from Notion workspace events
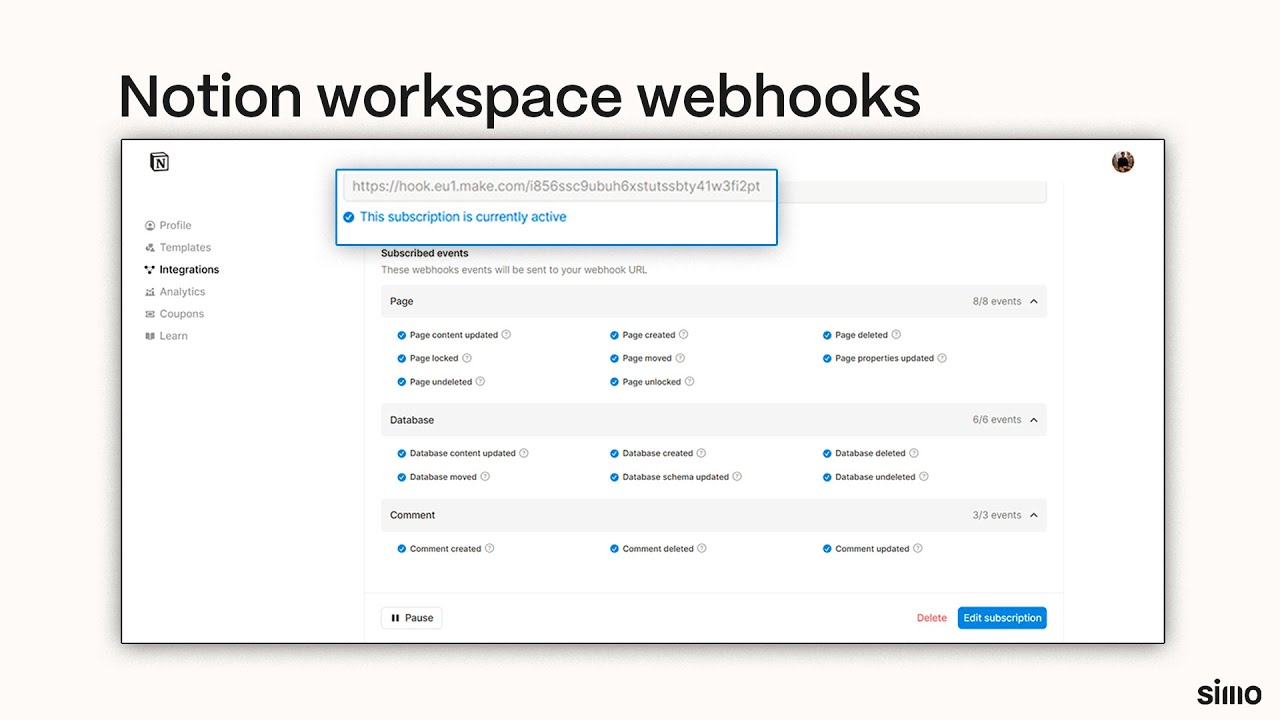
Think of it like this: Instead of repeatedly polling the Notion API to check if anything has changed, Notion will tell you the moment something important happens.
— from the official Notion webhooks documentation
In short, Notion webhooks allow you to trigger automations immediately upon a specific event that happens in a Notion workspace, without having to use Database Automations or Buttons. So far, only polling was available via the Notion API — that's why this is an important and much-requested update. Webhooks (instant triggers) are less resource intensive and more precise than polling (constantly checking for changes).
P.S. Some events are aggregated rather than delivered immediately — here is the official documentation explaining this concept.
—
Before the launch of Notion Webhooks, you couldn't instantly trigger external automations without using database automation webhook requests or buttons that triggered an external webhook.
Now, Notion can send webhook requests automatically based on many events that happen in your Notion workspace. This means your automations will start immediately when something happens, eliminating the need for the polling trigger to check for database changes or having to create multiple Database Automations.
Below are the available webhook events you can subscribe to from any Notion workspace.
For high-frequency events like
page.content_updated, Notion batches changes that occur within a short time window into a single webhook event. Events such aspage.created,page.deleted,page.undeletedoccur in quick succession, you may only receive the most meaningful result event -- or none at all if the state returns to its original one.Event aggregration helps reduce redundant calls and improves reliability. Aggregated events may have a slight delivery delay (typically under one minute).
— from the official Notion webhooks documentation
| **Type** | **Description** | **Is aggregated?** |
| `page.content_updated` | Triggered when the content of a page changes — for example adding or removing a block on the page. | Yes |
| `page.created` | Triggered when a new page is created. | Yes |
| `page.deleted` | Triggered when a page is moved to the trash. | Yes |
| `page.locked` | Triggered when a page is locked from editing. | No |
| `page.moved` | Triggered when a page is moved to another location. | Yes |
| `page.properties_updated` | Triggered when a page's property is updated. | Yes |
| `page.undeleted` | Triggered when a page is restored from the trash. | Yes |
| `page.unlocked` | Triggered when a page is unlocked | No |
| `database.content_updated` | Triggered when a database's content is updated— for example, adding or removing a child page. | Yes |
| `database.created` | Triggered when a new database is created. | Yes |
| `database.deleted` | Triggered when a database is moved to the trash. | Yes |
| `database.moved` | Triggered when a database is moved to another location. | Yes |
| `database.schema_updated` | Triggered when a database's schema is updated — for example, adding or removing a database property. | Yes |
| `database.undeleted` | Triggered when a database is restored from the trash. | Yes |
| `comment.created` | Triggered when a new comment or suggested edit is added to a page or block | No |
| `comment.deleted` | Triggered when a comment is deleted. | No |
| `comment.updated` | Triggered when a comment is edited. | No |
How to setup Notion workspace webhooks
Here are the steps to set up workspace webhooks in Notion:
- Create a webhook: you can create a webhook and subscribe to the desired events via the Integrations page. When you create a subscription, you will be asked to provide an HTTPS webhook URL and select all the events you want to subscribe to. Once done, select "Verify subscription".
- Verify webhook: at this point, Notion will send a one-time POST request to your webhook URL containing a
verification_token, which you can copy and paste in the Notion integration setup page for verification. You can resend theverification_tokenmultiple times if needed. Once verified, you can't change the webhook URL. Instead, you would need to delete and recreate the subscription. - Validate payload: every time Notion sends a request to your webhook, it will include a header that you can use for validation/security purposes (this is not required but recommended). Read all the specifics here.
- Testing: before testing, make sure your Integration has access to all the Pages and Databases you want to monitor. You can add Integrations to any Notion page/database via the dedicated menu on the three dots at the top right corner of the page/database. Read more here.
—
Here is a practical use case:
Say you want to track database schema changes because they may lead to errors or have been done by mistake. So you set up your automation accordingly:
- You add a Webhook trigger — this will provide you with the URL that you can paste in the Notion webhooks configuration menu for validation.
- You subscribe to
database.schema_updated(and other events based on your needs). - You add your integration to all the databases (faster if all your source databases are in one page) that you want to monitor.
- You will then receive data every time someone makes a structural change to one of those databases (e.g., adding/removing a property). Keep in mind that
database.schema_updatedis an aggregated event, so there are a few seconds of delay between when the change happens and when you receive the webhook request. - In your automation, you can process the data as you desire — for example, sending a Slack message with the details of the change or adding the change to a Notion database/Google Sheets.
—
This concludes the overview of Notion Webhooks. Watch the video for a visual demonstration. This is a nice feature that increases the customization possibilities of your workflows and opens up new, more reliable automation possibilities.